Cinnamon Applesauce Christmas Ornaments – Two Ways
If you’re looking for a festive and inexpensive homemade Christmas gift, look no further than cinnamon applesauce ornaments. They’re really fun to make with kids, too! The recipe and steps are super simple and your house will smell delicious once these are baking.
There are a few variations of this recipe (two of which are below). The most basic one calls for only two ingredients. You can barely get more simple than that! As the name suggests, the two ingredients are cinnamon and applesauce. I bought the least expensive cinnamon and applesauce I could find. Since you’re not eating these, there’s no need to spring for the highest quality ingredients.
Each recipe below will make about 10-12 medium-sized ornaments. Kids will enjoy using cookie cutters to make fun shapes! If you plan to use puffy paint to write names on the ornaments after they’re cooled, I recommend using medium-large cookie cutters to allow enough room.
Cinnamon Applesauce Ornaments
Ingredients
1 cup plain applesauce
1 1/8 cup cinnamon
Optional – 4 to 6 drops essential oil of choice (clove, nutmeg, orange, etc…whatever you think would smell nice!)
Directions
- Preheat oven to 200 degrees Fahrenheit. Line a baking sheet with parchment paper.
- In a medium bowl, combine applesauce, cinnamon and essential oils, if using. Stir with a wooden spoon until a ball is formed and the dough is smooth.
- Lay a large piece of parchment paper on work surface. Place dough in the middle of parchment paper and cover with a second piece of parchment paper of equal size.
- Using a rolling pin, roll out dough between the two pieces of parchment to about 1/4 inch thick.
- Cut dough into shapes using Christmas cookie cutters. Use a straw to make a hole at the top of each shape cut-out (for tying on string or ribbon later).
- Place cut-out ornaments on the parchment-lined baking sheet and bake in the 200 degree oven for two hours. Remove to cooling rack and cool completely.
- When cooled, decorate with puffy paint or glitter glue, if desired, and allow to dry. Tie a string or ribbon through the hole of each ornament.
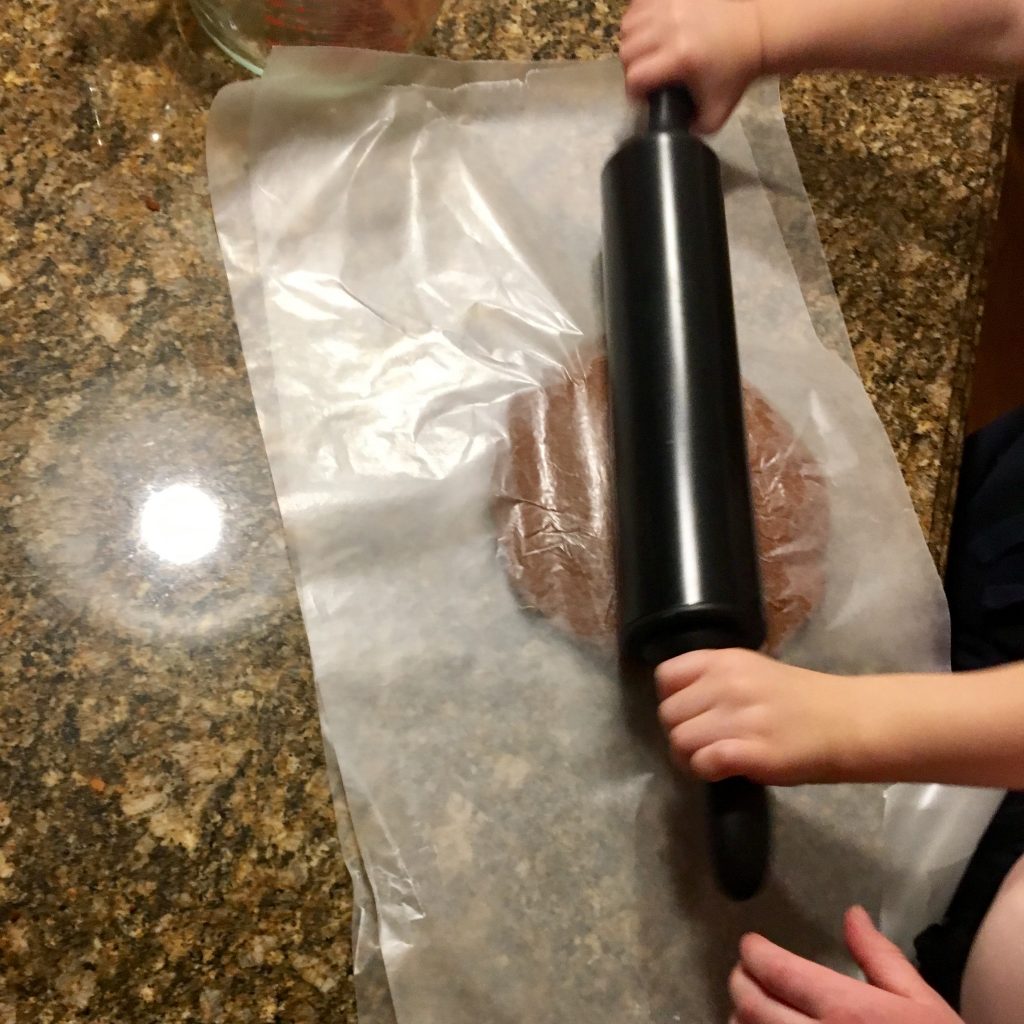
My six year-old rolling out the dough between sheets of parchment paper 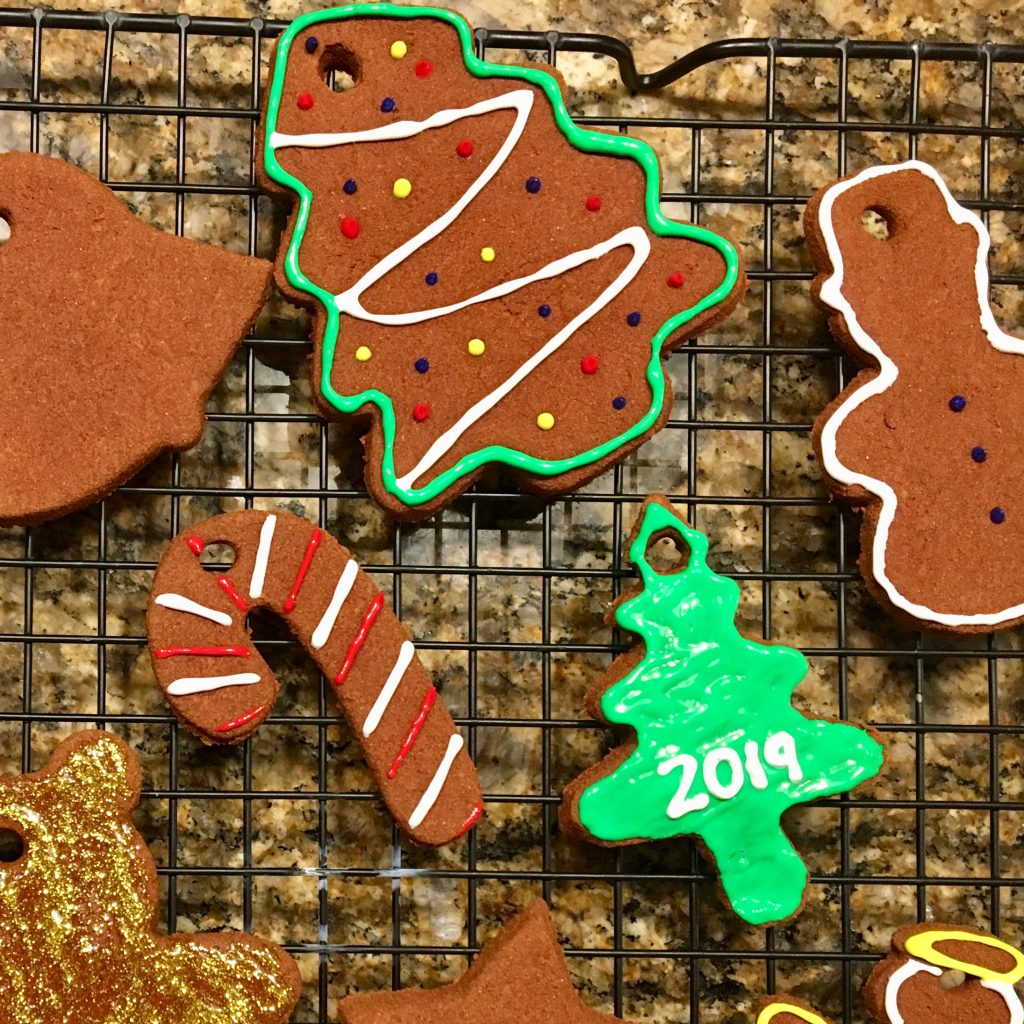
Undecorated and decorated with puffy paint 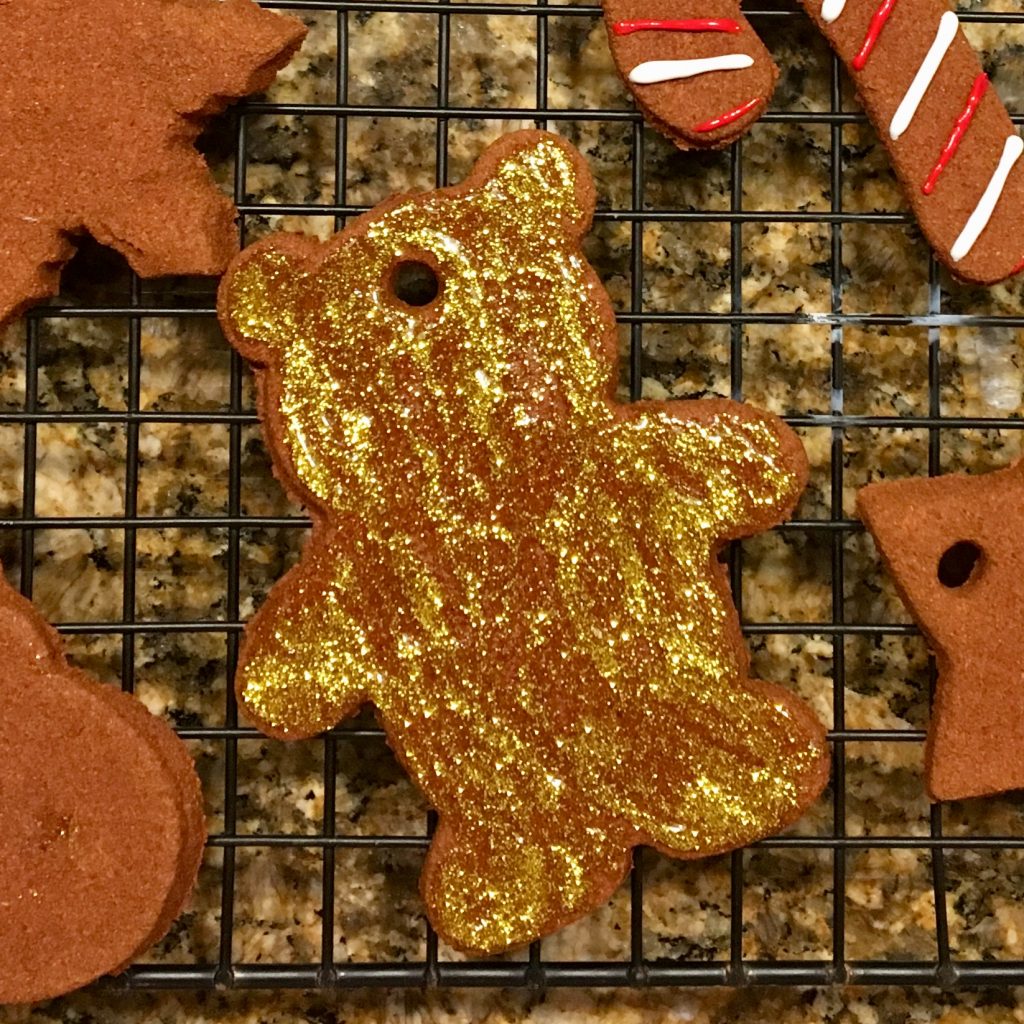
Decorated with gold glitter glue
Want to jazz things up a bit? For some festive sparkle, add one extra ingredient to these already super cute Christmas ornaments. Check out how to make Glittery Cinnamon Applesauce Ornaments!
Glittery Cinnamon Applesauce Ornaments
Ingredients
3/4 cup applesauce
1 cup cinnamon
2 Tablespoons glitter school glue
Optional – 4 to 6 drops essential oil of choice (clove, nutmeg, orange, etc…whatever you think would smell nice!)
Directions
- Preheat oven to 200 degrees Fahrenheit. Line a baking sheet with parchment paper.
- In a medium bowl, combine applesauce, cinnamon, glitter glue and essential oils, if using. Stir with a wooden spoon until a ball is formed and the dough is smooth.
- Lay a large piece of parchment paper on work surface. Place dough in the middle of parchment paper and cover with a second piece of parchment paper of equal size.
- Using a rolling pin, roll out dough to about 1/4 inch thick.
- Cut dough into shapes using Christmas cookie cutters. Use a straw to make a hole at the top of each shape cut-out (for tying on string or ribbon later).
- Place cut-out ornaments on the parchment-lined baking sheet and bake in the 200 degree oven for two hours. Remove to cooling rack and cool completely.
- When cooled, decorate with puffy paint or glitter glue, if desired, and allow to dry. Tie a string or ribbon through the hole of each ornament.
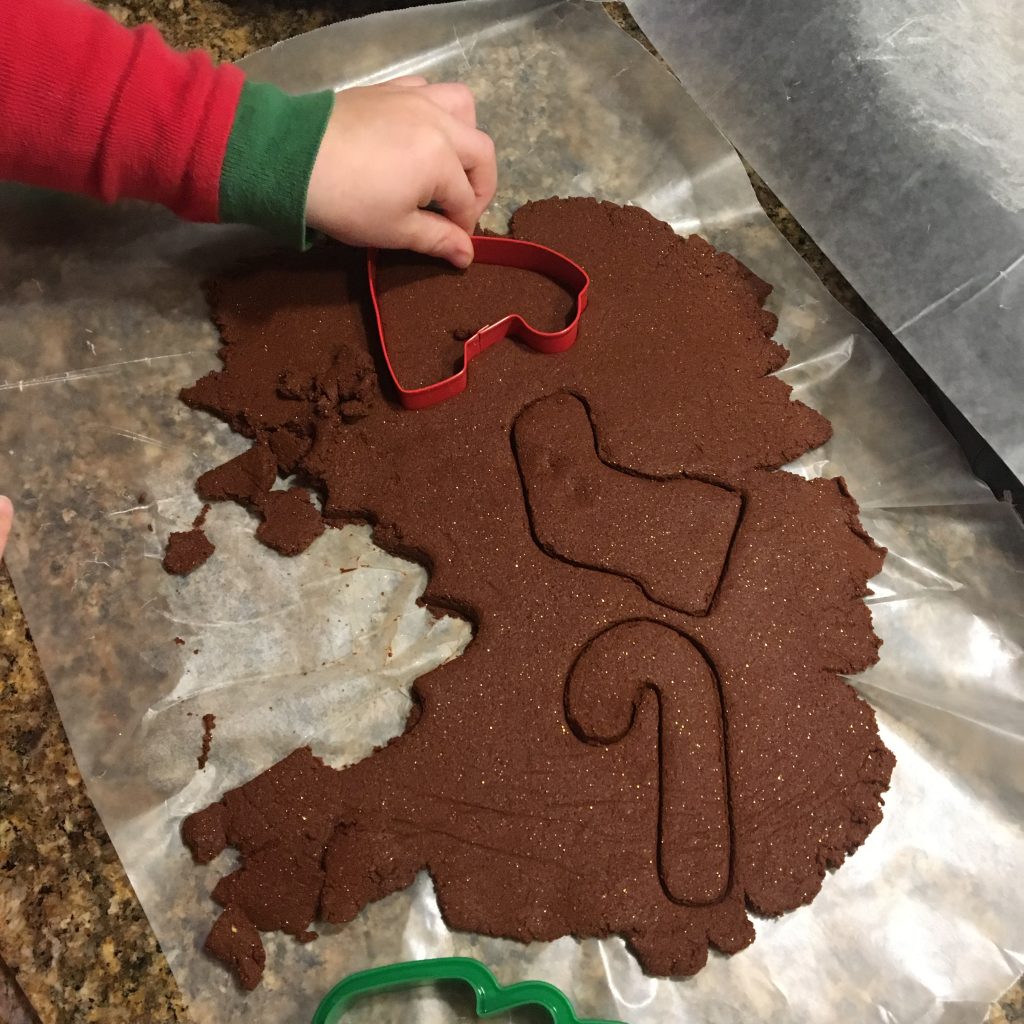
My three year-old cutting out ornamnets 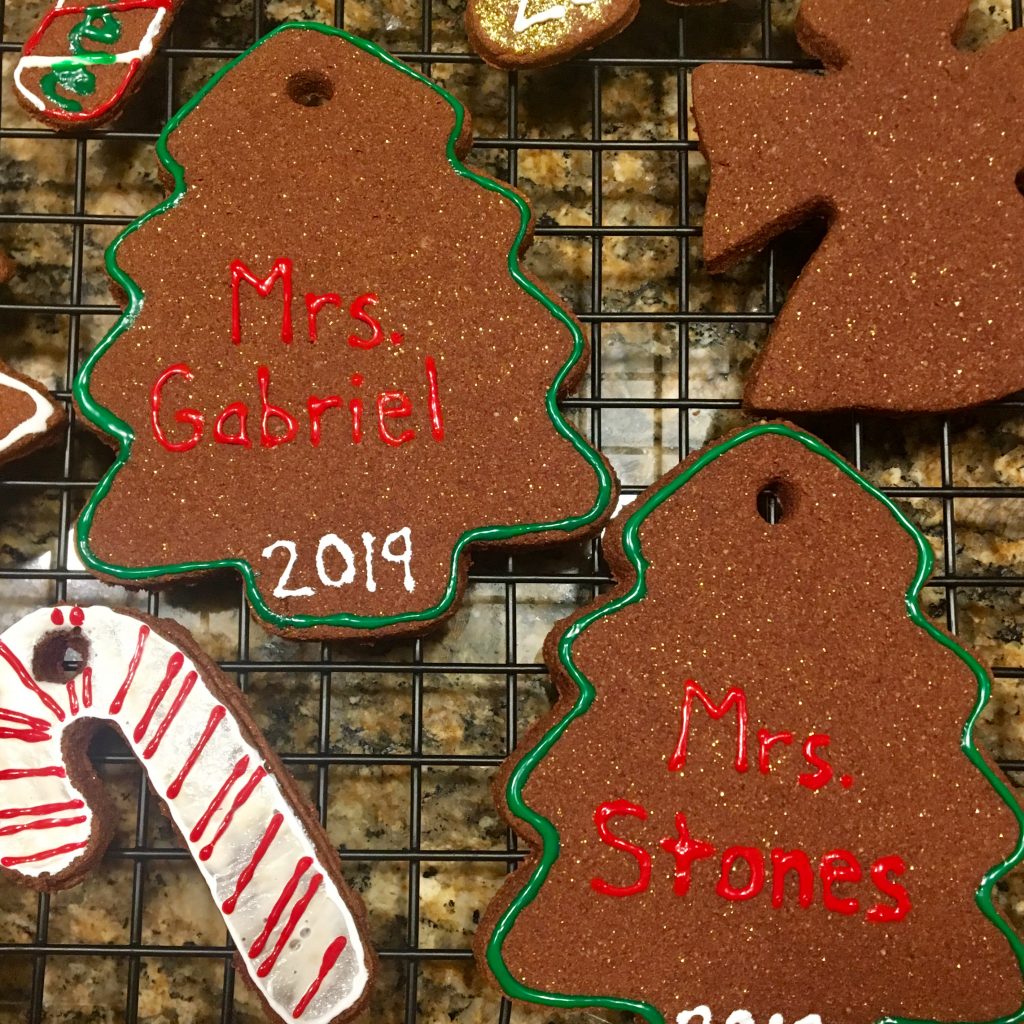
We made glittery ornaments as teacher gifts and used puffy paint to personalize 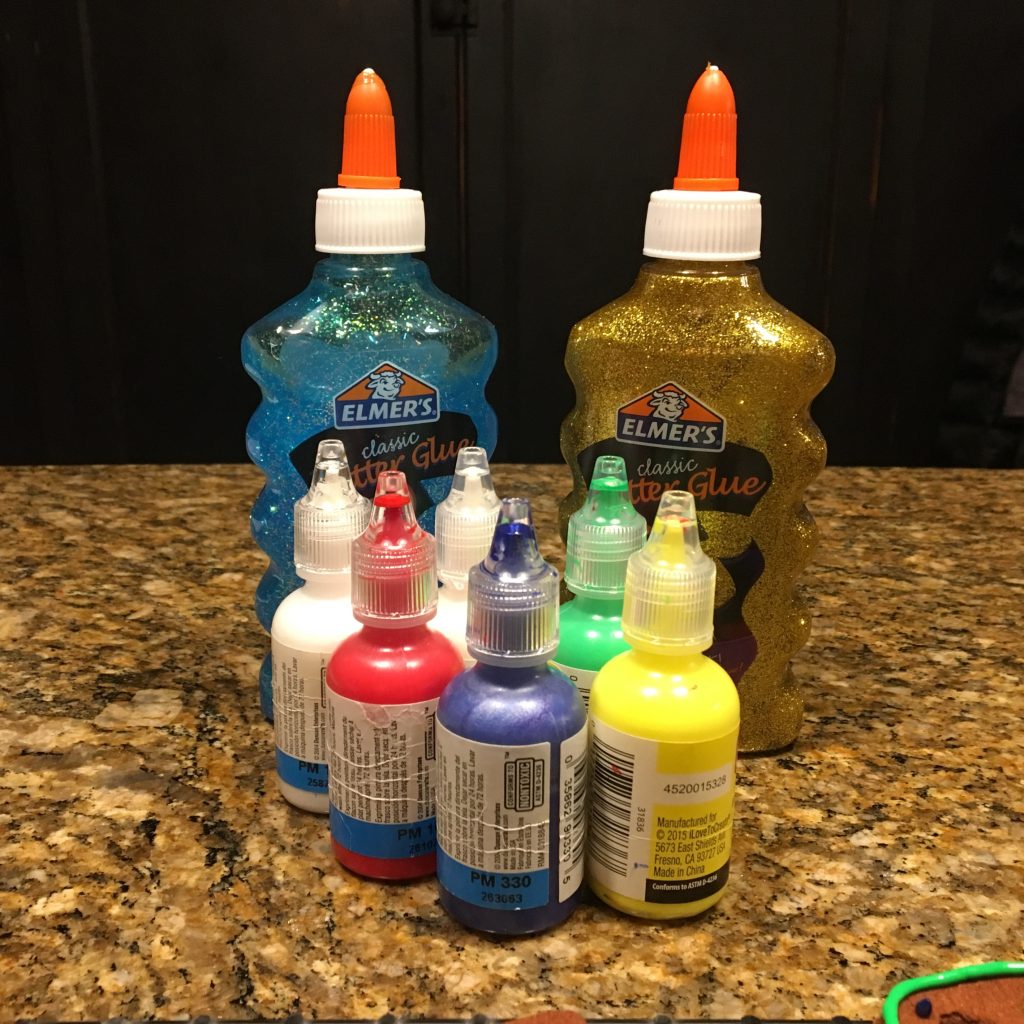
Glittery school glue and puffy paint
A Few Tips
When I made the glittery version of these ornaments, I didn’t have quite enough cinnamon to fill 3/4 cup. So, I put my cinnamon in a measuring cup then filled it the rest of the way with apple pie spice. You can do this with ground cloves, nutmeg, pumpkin pie spice or any other spices you have on hand that would blend well with cinnamon. This works with either of the two recipes, not just the glitter option.
There are several fun ways to use these ornaments! You can display them in the traditional way by hanging them on a tree or from garland. I’ve seen them used to decorate a wreath, which is pretty! We like to personalize them using puffy paint and give them as gifts. We paired them with some homemade cookies and a card for teachers this year. You can also tie them to a gift and use them as a keepsake gift tag. There are so many possibilities!
These ornaments will keep for years to come! As a kid, our family was gifted some of these, and when we got out the Christmas decorations each year, the box had a nice cinnamon scent to it! The scent really does last (but might fade just a bit as years go by). They are pretty sturdy and won’t break if handled and stored with care. However, they may shatter if dropped on a hard surface. I might know that from experience, ha ha! When making, be sure the dough is rolled out to no less than 1/4 inch thick for maximum sturdiness.
When you cut the dough with the cookie cutters, the edges will be a bit jagged. If you like the jagged look, then leave them as they are! I prefer a cleaner edge. So, after I move the ornaments to the cookie sheet, I use my finger to go around the edges and smooth out the dough.
When making these with kids…
My kids (ages six and three) wanted to help decorate the ornaments, but I didn’t want to let them use puffy paint since it doesn’t wash out of fabrics (just in case they made a mess). So, I let them use washable glitter glue for decorating and they turned out pretty cool! See the picture of the gold bear above as an example.
Even though these ornaments are made with edible ingredients, they are not edible. With the high amount of cinnamon that is called for, they do not taste good at all. In fact, they are quite spicy! One of my kids really wanted to taste the dough the first time we made these several years ago. I kept telling him he couldn’t until I finally let him go ahead and try it (a TINY piece about the size of a sesame seed). I’ll just say he has never asked to try it again! After these are baked, they are too hard to bite…so take it from me and don’t try to eat them 🙂
Merry Christmas! Enjoy making these fun and festive ornaments! If you make them, feel free to share your experience in the comments.